 OpenMock Blog
Guides
Camera moves for product videos: pan, zoom, blur, light
The handful of camera moves, blur settings and lighting choices that make a device mockup video look filmed rather than generated — with the numbers that work.
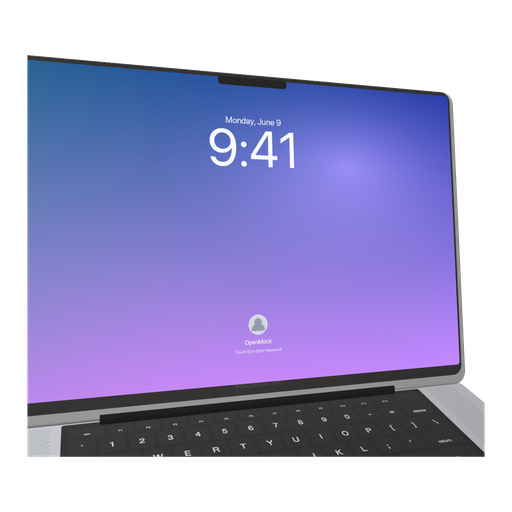
The difference between a mockup video that looks like a template and one that looks like a shoot is almost never the device model. It is the camera: how far it moves, how fast, with how much blur, in what light. Those are a small number of decisions, and this guide gives you the ones that work, with the settings as they appear in OpenMock — pan, zoom, tilt, roll and flap on a keyframe timeline, adaptive motion blur, depth of field, screen glow and HDRI environments.
The camera vocabulary
- Pan — slide the camera left/right or up/down. Reads as "looking around the product."
- Zoom — move closer or farther. The most powerful move and the easiest to overdo.
- Tilt — orbit the camera around the device, horizontally or vertically. Shows depth and the device's edges.
- Roll — rotate the frame. A few degrees adds energy; more than ten looks like a mistake.
- Flap — rotate the device rather than the camera: open a laptop lid, spin a phone to show its back, tip a tablet.
Every one of these is a keyframeable value in OpenMock; a shot's camera is a start state and an end state (or more) on the timeline, and the renderer interpolates.
Five moves that always work
1. The settle-in. Start tilted 20–30° and zoomed out 10–15%, end straight-on and framed. 3–4 seconds. This is the universal opener: motion that ends in stillness, drawing the eye to the screen exactly as the recording starts.
2. The slow push. A 3–6% zoom over 8–12 seconds while the screen recording plays. Barely visible, but the frame is alive. Use for the demo shot.
3. The lateral drift. Pan slowly across an open laptop or monitor while holding the tilt. Reads as a dolly move; suits landscape devices.
4. The lid reveal. MacBook lid from nearly closed to ~105° over 2–3 seconds while the camera rises from below screen height to just above it. The recording starts as the lid passes 90°.
5. The flip. A phone rotating 180° to show the back, then continuing to the front with the screen lit — a single flap keyframe pair. Good for hardware-forward openers and for TikTok-paced cuts.
The rule under all five: one move per shot. Combining a zoom with an orbit with a roll is how templates look like templates.
Motion blur, and why fast moves strobe
A real camera's shutter is open for part of each frame, so moving objects smear slightly; that smear is what makes motion feel continuous. Rendered video has no shutter — each frame is perfectly sharp — so a fast camera move stutters visibly.
OpenMock's motion blur simulates a shutter by rendering several sub-frames across a shutter window and averaging them. The shutter is the setting: Low is a quarter of a frame interval, Medium a half (the classic 180° shutter), High most of the frame. The number of sub-samples is adaptive — it estimates how many pixels the camera moved and renders more samples for faster moves, up to 32 — so slow shots stay cheap and fast shots stay smooth.
Which to pick:
- Low for anything with readable UI text — it smooths the camera without softening the screen.
- Medium for lid reveals, orbits and hero shots where the device is the subject.
- High for stylised, fast, hardware-only moves. Never with small text.
Depth of field
A shallow depth of field — the near edge sharp, the far edge soft — is the strongest single cue that something was photographed rather than rendered. Use it lightly on stills and hero shots; keep it off or minimal on demo shots where the whole screen needs to be readable. It pairs well with the lateral drift, where the focus plane's shift across the device becomes part of the move.
Light: environments and screen glow
Lighting is what separates plastic from product.
Environments. OpenMock's three HDRI environments are real captured light: Studio (bright, neutral, e-commerce), Concrete (warm, directional, editorial) and Dark Room (low ambient, dramatic, keynote). The environment is reflected in the device's glass and metal, so the choice shows up in every highlight.
Screen glow. A lit display casts light on its surroundings — the bezel, the keyboard deck, the surface below. Screen glow simulates that from the actual content on the screen, so a blue UI throws blue light and a white UI throws white. It is the effect most people cannot name but immediately notice is missing. Two notes: bright, light-themed UIs need much less glow than dark ones, and glow plus Dark Room is the keynote look.
Effects to use sparingly. Bloom on bright accents; a whisper of grain on stills; vignette only on dark backgrounds; the glass-border highlight when the device sits on a dark gradient. Every one of these is a garnish, not a meal.
Timing and structure
- Ease, don't linear. Keyframed moves that start and stop gently feel filmed. Abrupt starts feel mechanical.
- Hold longer than feels natural. Viewers need time to read the screen; a 10-second hold with a 4% push looks confident.
- Cut on the beat if there is music (audio clips sit on the same timeline), and let the biggest move land on the downbeat.
- Match pace to platform. TikTok wants 3–6 second shots and cuts; a landing page wants a single 10-second loop; Product Hunt sits between.
Settings that work, by shot type
| Shot | Move | Duration | Motion blur | DoF | Environment |
|---|---|---|---|---|---|
| Opener / settle-in | tilt 25°→0°, zoom −12%→0 | 3–4 s | Medium | light | Dark Room + glow |
| Demo hold | zoom 0→+4% | 8–12 s | Low | off | any |
| Lid reveal | lid 15°→105°, camera rises | 2.5–3 s | Medium | light | Dark Room + glow |
| Lateral drift | pan across screen | 6–10 s | Low | on, shifting | Concrete |
| Hardware flip | flap 0→360° | 1.5–2 s | High | off | Studio |
| Hero still | none | — | — | on | Studio or Dark Room |
FAQ
What motion blur setting should I use for a product video?
Low whenever the screen has readable text; Medium for device-centric hero moves and lid reveals; High only for fast, stylised hardware moves without small text.
How fast should the camera move in a mockup video?
Slower than instinct. A 3–6% zoom over 10 seconds is a strong move; a full orbit should take at least 4 seconds. Fast moves strobe unless blurred, and blur softens the UI.
What is screen glow?
Simulated light from the display falling on the device and its surroundings, derived from the on-screen content. It is the cue that makes a lit screen look real.
Which lighting environment should I use?
Studio for clean, bright product shots; Concrete for warm editorial looks; Dark Room with screen glow for the dramatic keynote style.
Can I keyframe the lid of the MacBook?
Yes — the lid angle is a keyframeable value, so a shot can open the laptop while the camera moves and the screen recording begins.