 OpenMock Blog
Guides
How to make an app promo video in your browser (2026 guide)
A tool-honest guide to a 15–30 second app promo video: what to show, how to structure it, which sizes to export, and how to do it in minutes.
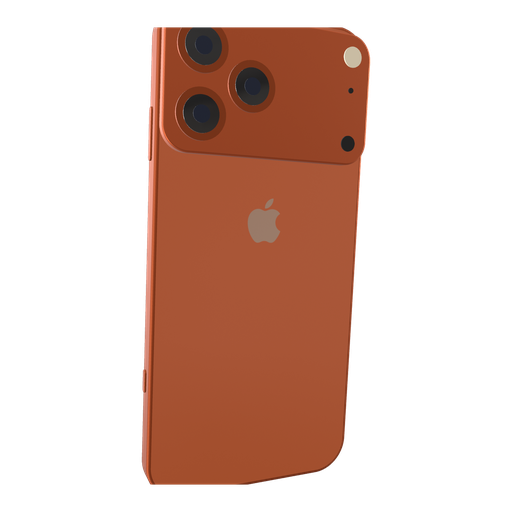
Every app launch needs the same short video: a device, your UI doing its best trick, a line of text, fifteen to thirty seconds. It goes on the App Store, on Product Hunt, in the launch tweet, at the top of the landing page. It is also the asset most teams put off, because the traditional route — After Effects, a 3D device template, a render farm's worth of waiting — is a day of work for a designer who has other things to do.
This guide is the short route. It assumes you have a screenshot or a screen recording and nothing else, and it gets you to an MP4 that looks filmed rather than generated. The workflow uses OpenMock, which runs in the browser with no account and no upload, but the structure applies to any tool.
What a promo video has to do
A promo video is not a tutorial. Nobody learns your app from it; they decide whether to look closer. That means it has three jobs, in order:
- Read as a real product in the first second. A screen with UI moving on it, on hardware people recognise. Not a logo, not a title card.
- Show one thing well. The single interaction that makes your app worth having. One, not five.
- Land the name. A tagline and a logo at the end, after the demo has earned them.
Everything else — camera moves, lighting, music — exists to make those three beats feel premium. If a move does not serve them, cut it.
Capture the right footage first
The video is only as good as what is on the screen, so spend your effort here.
- Record on the device or simulator at native resolution. iOS Screen Recording produces HEVC .mp4/.mov files that import directly. On Mac, QuickTime or the built-in recorder works; on Windows, Xbox Game Bar or OBS.
- Clean the status bar. 9:41, full signal, full battery is Apple's convention and looks intentional. Turn on Do Not Disturb so a notification does not land mid-take.
- Use real content. Placeholder text and empty states look like a wireframe; three realistic entries look like a product.
- Slow down. Tap deliberately, scroll smoothly, pause on the result. You can speed the clip up later (OpenMock has a per-shot speed control), but you cannot add missing frames.
- Fifteen seconds of good footage is plenty. You will use eight to twelve.
Build the scene
Open OpenMock in a desktop browser and:
- Pick the device. iPhone 17 Pro Max if you want the flagship and the App Store's required 6.9-inch canvas; iPhone 17 for a friendlier consumer look; MacBook Pro 14-inch or Pro Display XDR for desktop and web products; iPad Pro for tablet apps. Every model is a procedural 3D object — orbit it, tilt it, open a lid.
- Drop your recording onto it. It plays on the screen. Trim the in-point to where the action starts; set the speed if you recorded slowly.
- Set the canvas ratio in the top bar for where the video is going: 9:16 for Reels, TikTok and Shorts; 16:9 for YouTube, X and landing pages; 4:5 or 1:1 for LinkedIn and Instagram feeds; the App Store presets for store previews.
- Choose a background and light. A solid or two-colour gradient in your brand palette, or a blurred photo. Pick an environment — Studio for clean, Concrete for warm, Dark Room for keynote drama — and turn on screen glow so the display lights the hardware around it.
Animate it in three shots
The most reliable promo structure is three shots on the timeline, each with its own camera keyframes:
Shot 1 — the reveal (3–4 s). Start with the device tilted 20–30° and slightly off-centre; keyframe the camera to settle straight-on while the screen recording starts. Motion blur on low smooths the move without softening UI text.
Shot 2 — the demo (8–12 s). Hold nearly still. A very slow push-in (a few percent of zoom over the whole shot) is enough. Let the recording carry it. This is where viewers read the interface, so keep it big and stable.
Shot 3 — the close (3–4 s). Pull back or drift sideways into a text shot with the tagline, then a logo shot. Fade transitions are set per shot; a short fade in and out on the whole timeline finishes it.
Add an audio clip if the destination plays sound (YouTube, landing page) and time the cut to shot 2 on a beat; skip it for feeds that autoplay muted, or keep it and assume nobody hears it.
Export for where it is going
| Destination | Canvas | Export size | Length | Notes |
|---|---|---|---|---|
| App Store preview (iPhone) | 9:16 | Custom 886 × 1920, 30 fps | 15–30 s | Apple's accepted iPhone size; H.264 |
| App Store preview (iPad) | 3:4 | Custom 1200 × 1600, 30 fps | 15–30 s | |
| Product Hunt | 16:9 | 1920 × 1080 | 30–90 s | Upload to YouTube; PH takes a link |
| X / Twitter | 16:9 or 9:16 | 1920 × 1080 / 1080 × 1920 | 8–20 s | Under 140 s; X re-encodes |
| Instagram Reels, TikTok, Shorts | 9:16 | 1080 × 1920 | 7–30 s | Keep the bottom fifth clear |
| 4:5 or 16:9 | 1920 × 2400 / 1920 × 1080 | 20–45 s | Assume muted; burn in text | |
| Landing page hero | 16:9 or 21:9 | 1920 × 1080 / 4480 × 1920 | 6–15 s, looping | Also export a transparent PNG still |
Video export is free at up to 720p/30 fps with a small watermark; Pro ($5/month or $36/year) removes the watermark and unlocks 4K and 60 fps. Image exports — PNG, JPEG, WebP, transparent PNG — are free at any size, so the still for your landing page costs nothing.
Mistakes that make promo videos look cheap
- Too many camera moves. One move per shot. Orbits and zooms and rolls read as a template demo.
- Fast motion with sharp UI. Either slow the camera or add motion blur; a fast, un-blurred pan strobes.
- Text over the screen. Put taglines in text shots or beside the device, never across the UI.
- Opening on a logo. The logo goes last. The first frame is the product.
- Ignoring the platform's overlays. Reels, TikTok and Shorts draw buttons and captions over the bottom and right of the frame; compose around them.
- Exporting 4K for X. X downscales to 1920 × 1200 and re-encodes; a clean 1080p file looks better after compression.
FAQ
How long should an app promo video be?
Fifteen to thirty seconds for stores and social; App Store previews must be 15–30 seconds by rule. Product Hunt tolerates 30–90 seconds. Landing-page heroes work best as 6–15 second loops.
Do I need After Effects or a 3D program?
No. A browser-based 3D mockup tool gives you a real camera, lighting and motion blur without a render pipeline; the whole workflow above takes ten to twenty minutes the first time.
Can I make the video from a screenshot instead of a recording?
Yes — the camera move provides the motion. A screenshot with a slow orbit and a text shot is a perfectly good hero video. A recording is better when the interaction itself is the pitch.
What frame rate should I export?
30 fps for App Store previews (Apple's spec) and for most feeds. 60 fps when the recording scrolls or animates quickly and the destination preserves it (YouTube, landing pages).
Does OpenMock upload my footage?
No. Rendering and video encoding happen in your browser; nothing is sent anywhere and there is no account.